
How To Choose The Right Exposed Aggregate Supplies For Your Outdoor Space
Exposed aggregate is strong, gorgeous for many homes, and durable, but what supplies do you need to keep your outdoor space looking sleek?
Whether you plan to recreate the exterior of your pool, driveway, outdoor patio, or pathways, it’s important to understand what exposed aggregate supplies will work for your project!
This article will guide you through ideal products when working with exposed aggregate concrete as a DIYer, how to seal concrete, and how to get a lasting result with your chosen style.
What is Exposed Aggregate Concrete?
Traditionally, concrete has been trowelled or stippled for a smooth cement surface, but today, decorative concrete has grown in popularity, especially exposed aggregate. Exposing the internal aggregate–whether natural or added–you can update your tired, dull concrete surfaces with a surface you can customise.
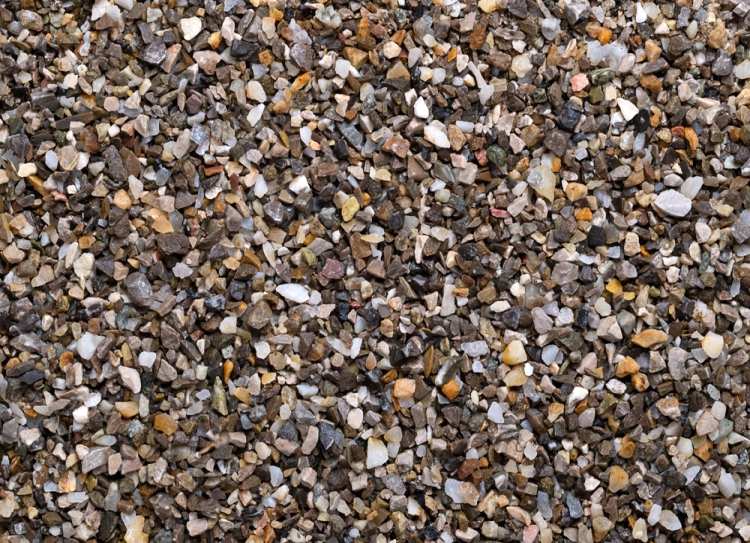
Exposed aggregate has endless creative choices, such as granite, quartz, gravel, limestone, granite, crushed stone, natural sand, repurposed glass, seashells, basalt, and more.
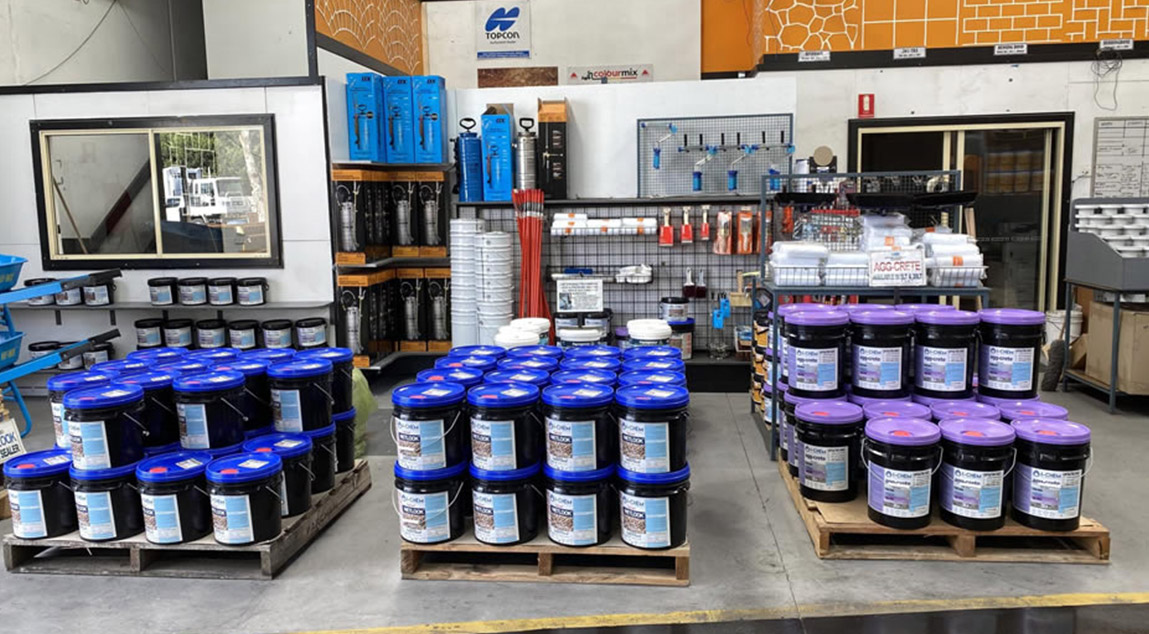
Choosing Exposed Aggregate Supplies: Where To Start?
Let’s take a look at some supplies you can use for exposed aggregate.
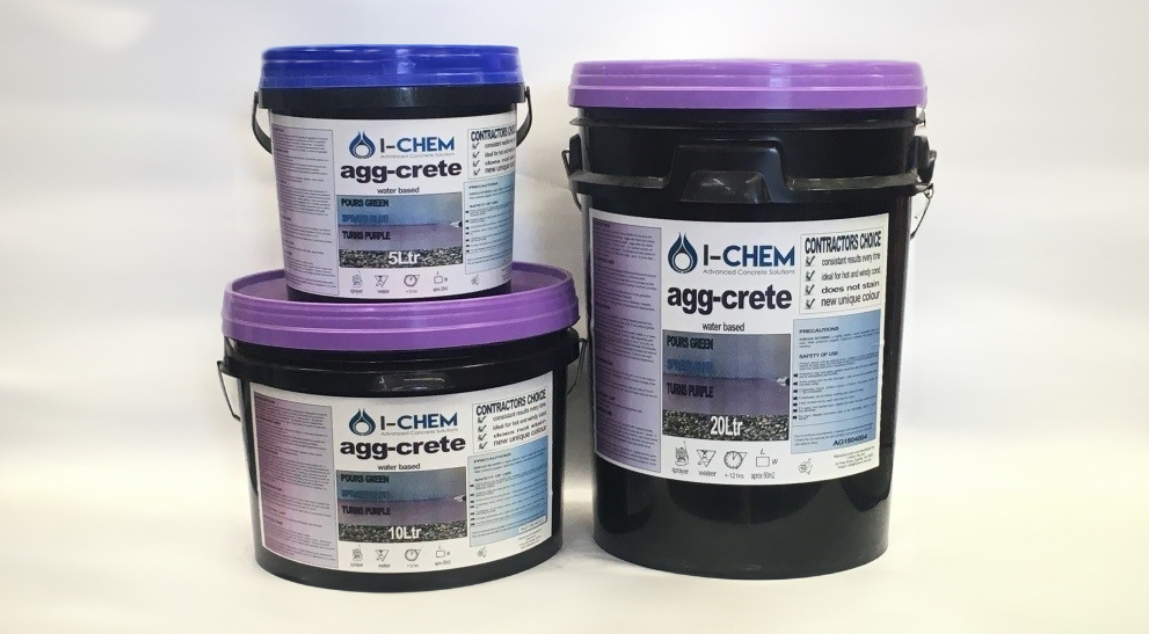
The i-CHEM AGG-CRETE LIQUID
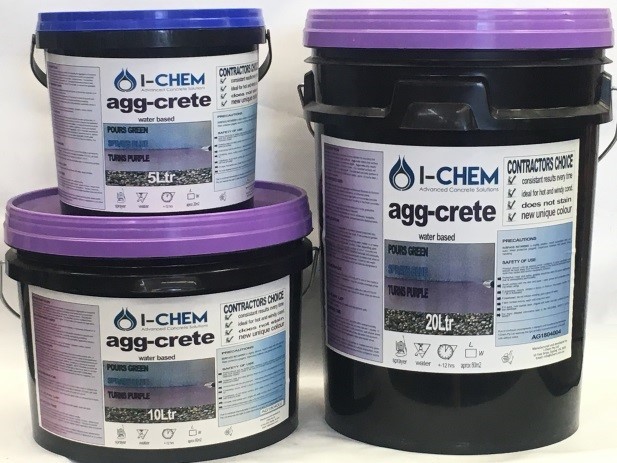
i-CHEM AGG-CRETE comes in a 5L pail, a 10L pail with a reusable pouring spout, and a 20L pail with a pouring spout.
i-CHEM Vertical AGG
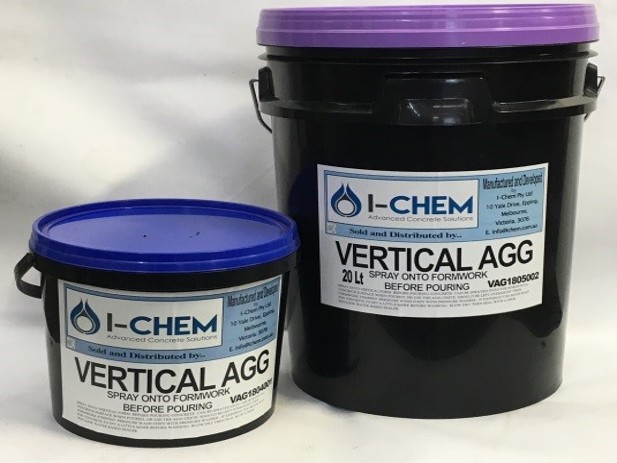
If you are working with vertically exposed aggregate surfaces, the i-CHEM Vertical AGG can delay the setting of mortar paste to a controlled depth, which is especially important if you’re working on a hot day.
If you don’t want the concrete to set from a large, slow pour, the i-CHEM Vertical AGG works with retaining walls, risers in steps and is sprayable. Choose from a 5L pail, a 20L with a reusable pouring spout, and covers approximately 10m2 per 5L pail.
Sika Rugasol C
Are you working on a new driveway, patio, floor slab, footpath, or swimming pool? This is a concrete surface retarder for horizontal construction joints and surfaces, ideal for cooler conditions or low retardation conditions.
Sika is easy to use and an economical choice for achieving ideal joints, renderings, and screeds on freshly placed aggregate concrete.
What supplies should you choose? This depends on a few factors:
- You want to prevent water from penetrating your concrete project.
- You want to protect concrete from freeze/thaw damage.
- You want to prevent damage to salt and chemicals.
- You want concrete protection without extra surface slip.
- You don’t want to change the colour of your concrete.
If you’re unsure, speak to the Australian Slate Crete builder suppliers for a professional recommendation. We’re always happy to help you with your home project.
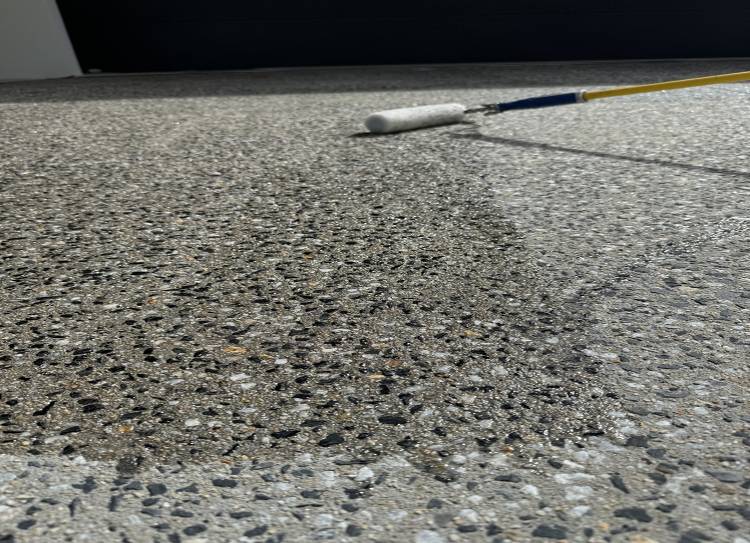
A Guide to Sealing Concrete
First time sealing concrete?
If it’s your first time sealing concrete, here is a quick how-to!
- Prepare the surface. The new concrete must be cleaned before applying an A.S.C. sealer. A high pressure water blast (1500 psi) will remove concrete salt, dust, dirt, and contaminants. Also acid etch the surface to support surface absorption with up to 1 litre of hydrochloric acid and up to 10 litres of clean water. Flush the surface with one part A.S.C Concrete Degreaser to 80 parts water to neutralise the acid solution. The surface must be completely dry before sealing.
- Now, apply the first coat. Dilute by 15-20% using an A.S.C. Solvent to assist penetration into the concrete, and stir thoroughly. Apply this first coat evenly by broom or roller at a rate of around 4.7 m2 per litre.
- Next, apply the second coat after the first coat has dried. Apply this coat neat or slightly diluted using an A.S.C. Solvent (around 5%) by broom or roller, making the application as even as possible. More solvents may need to be added in warmer weather.
- Use a Slip Resistant Powder to slightly thicken the sealer, and dilute with the A.S.C. Solvent to suit you. Sealing a very steep and smooth concrete is not recommended.
When and when not to seal? Don’t apply a sealer early in the morning or later in the day, as this can risk damage by moisture, condensation, and an increase in dampness. The A.S.C Sealer can be affected by moisture and can lose gloss, adhesion, and turn milky in appearance.
During winter, the concrete surface can remain damped for longer, so it is highly recommended to seal it in the early afternoon to ensure maximum dryness. Chalking or dusty concrete surfaces should not be sealed as this can risk the sealer peeling.
To keep your concrete surfaces looking their best in your home, you should scrub the surface every 5-6 months with an A.S.C Concreter Degreaser and a pressure blaster if you have one.
Need to reseal concrete?
Do you need to reseal your concrete? Here is a fast rundown of what to do.
- Thoroughly clean existing concrete to remove oil, grease, dirt, and contaminants. An A.S.C Concrete Degreaser is used along with a high pressure water blaster (1500 psi) and acid if required. Allow to dry.
- Apply an A.S.C Solvent to the sealed surface in approximately 1 metre x 1 metre squared. Apply solvent to the next section before working it into the surface. While the solvent is softening the second area, go back to the first with a broom and scrub the surface. While scrubbing, the sealer will soften and become tacky; broom enough solvent into the sealer until you have softened all layers. Apply solvent again before working on the next section. Repeat this process, and when the surface has become dry, you can apply a coat of sealer for maximum adhesion.
- The sealer can be applied with a soft-bristled broom, roller, or sprayer. If you’ve used a sprayer for the job, it is recommended to broom straight away after spraying for evenness and to support penetration.
- Now, it’s curing time! The time it takes depends on the temperature. At 25 degrees Celsius, an A.S.C Sealer will touch dry in approximately 20 minutes. In warmer weather, allow 1 hour between coats and longer in cooler weather. For best results, allow 24 hours between applications, and full curing time can be achieved seven days at ambient temperature. Do not park vehicles with hot tyres on freshly sealed concrete for at least seven days.
What about removing tyre marks? Apply a generous amount of A.S.C Solvent to the marks, and broom or brush the affected areas until the sealer becomes tacky. Use a cloth to wipe the tyre mark from the sealer. Finally, more A.S.C Solvent should be applied to the surrounding areas to even out the softened sealer.
Always make sure that there is enough ventilation and avoid breathing vapours. Do not use Australian Slate Crete Supplies concrete and paver sealers while smoking or when near a flame. Remove all non-canned foods from the area if ventilation isn’t possible during application or drying.
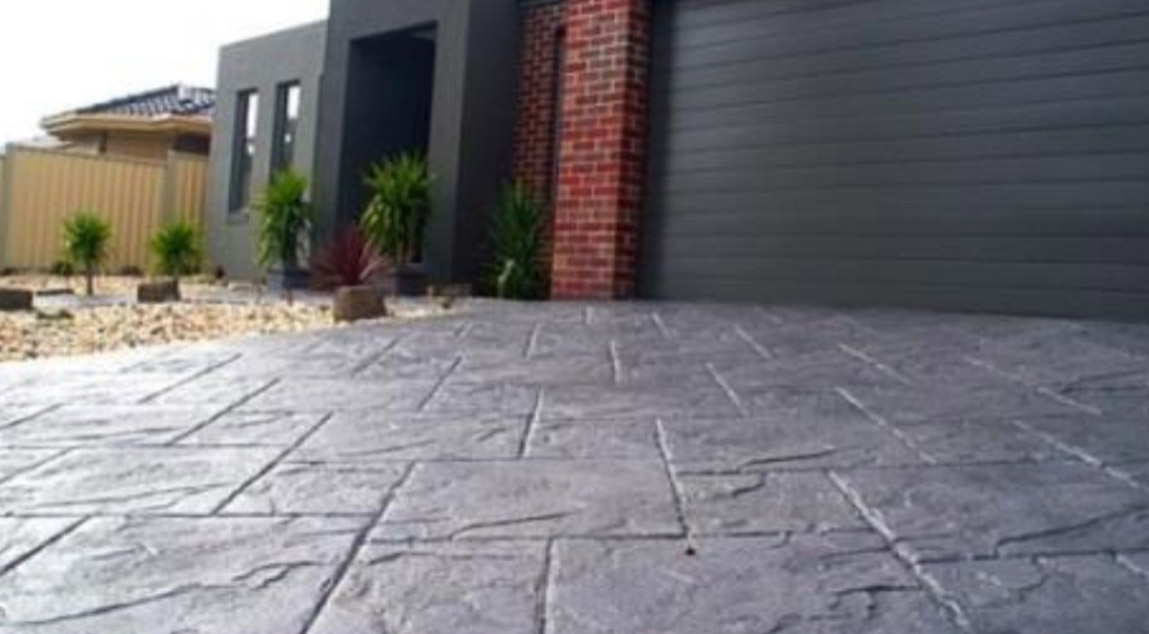
Styles of Exposed Aggregate
Want to understand how this concrete is poured and finished? Here are the different ways you can lay your concrete.
Standard exposed aggregate
All concrete contains a natural aggregate mixed into the concrete batch. Although this is the most simple exposed aggregate finish, you have limited control of the end look.
Standard aggregate is ideal if you’re content with the randomised placement of rocks, gravel, and sand.
Seeded exposed aggregate
For the most control over your designs, seeded exposed aggregate is the way to go. Placing–or seeding–aggregate into the surface of wet concrete at the time of placement, gives you creative control.
Topping exposed aggregate
If you want more control over your rocky designs, seeded exposed aggregate is a great choice. By pouring a concrete slab with an additional top layer, which is poured when the slab is dry.
This top layer (or topping concrete) is often 1 to 2 inches thick and can be filled with your aggregate of choice.
Choosing Exposed Aggregate: What To Consider
What do you need to take into account when choosing your ideal concrete? The type of aggregate you choose influences the supplies you’ll need, after all.
The size and shape
How large is your surface? From 3/8 of an inch to 2 inches or more in diameter, the shape and size need to match your surface area, or you risk it not fitting.
For example, rounded aggregate options provide the best coverage, with a smoother surface that is comfortable to walk on. Angular concrete, on the other hand, has more texture and dimension, so it is rough to the touch.
Your ideal colour
The colour of your surface depends on the stone you choose. There are many natural, unique colour schemes to complement your garden, garage, or home.
Popular colours include pastels like pink or rose quartz, rich or bold colours such as dark blue and red granite, or earthy tones such as grey limestone, river stones, or black basalt.If you’d like to learn more, read about the benefits of full-depth coloured concrete driveways for your home.
The texture
Once you’ve identified your ideal colour, size, and shape, the texture is next.
Consider if your concrete is mainly used for vehicle traffic, if you’ll be walking on the concrete daily, and if your surface requires a drainage solution during rainy days. If you plan on parking the family car, aim for a coarse aggregate mix to prevent skidding.
Australian Slate Crete – Concrete Supplies in Melbourne
As a leading building distributor in Australia for over 25 years, Australian Slate Crete Supplies offers all customers the best materials tested for quality control. After all, we want you to get perfect results for your project.
Whether you’re on the lookout for concrete hardeners, concrete sealers, stencils, hand tools, spray-on concrete supplies, or acid and cleaning chemicals, contact us today, and we’ll help you get the job done right the first time.
-
 February 4, 2022Sandstone Concrete Stencil
Do you want to add a touch of luxury and elegance to your concrete projects? If so, then consider using sandstone concrete stencils!
Read More -
 February 4, 2022Gloss Brick Sealer
Gloss brick sealer is a wonderful material for adding a brilliant shine to your brick slip wall feature.
Read More -
 February 4, 2022Bluestone Concrete Sealer
In a broad sense, the term “bluestone” is sometimes used to refer to a variety of stones. It’s a marketing term rather than a geological one.
Read More