
How to Seal a Concrete Driveway: A Step By Step Guide
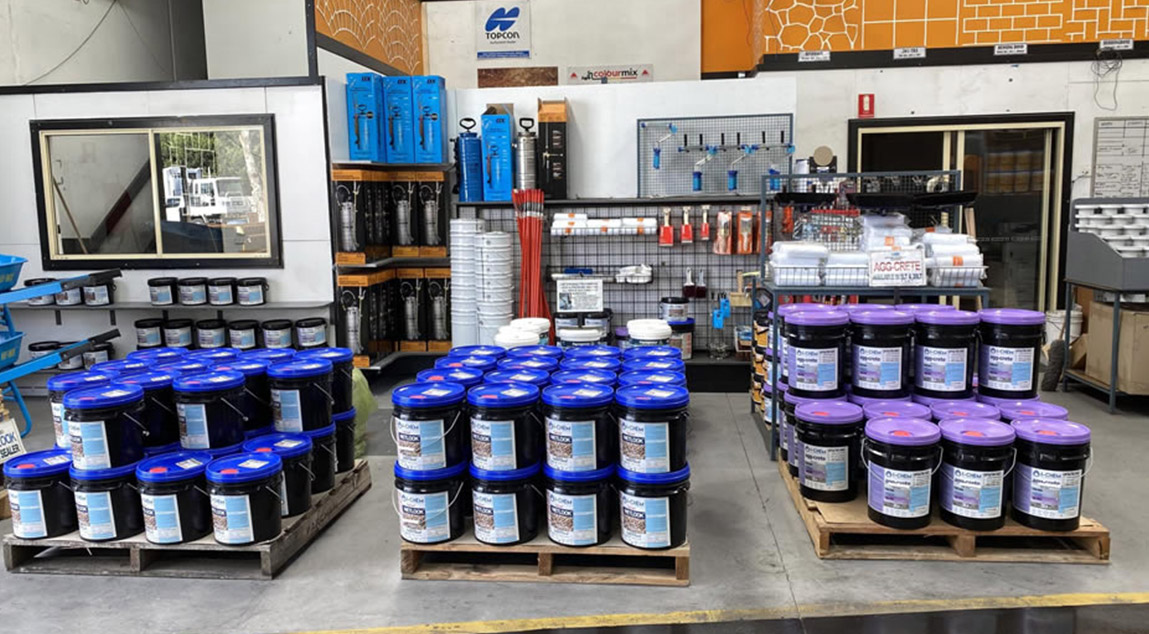
Whether you’ve recently had a concrete driveway laid, moved into a new property or just want to make sure your driveway looks and functions well for years to come, you may be considering sealing your driveway. While it can seem intimidating at first glance, with so many options and steps involved, Australian Slate-Crete Supplies is here to make it easy. We have 25 years of experience in concrete sealing and cleaning, meaning we can provide you with industry-leading products and advice.
This article offers you a comprehensive guide on concrete sealing: the whys, hows and handy tips to ensure you get incredible results on the first try.
Why Seal Your Driveway?
Sealing your concrete driveway is more than just a cosmetic enhancement; it offers numerous benefits, ensuring your investment stays in top condition for years to come.
Protection from Weather Elements
One of the primary reasons for sealing your concrete driveway is to provide a barrier against the harsh Australian weather it faces throughout the year. This barrier prevents water from seeping into the concrete, thus averting potential damage caused by freeze-thaw cycles. Don’t forget, some areas in Melbourne can reach freezing temperatures overnight! In these cases, water can penetrate the concrete surface and expand when it freezes, causing cracks and other structural damage. Sealing your driveway also protects it from the sun’s harsh UV rays, which can cause discoloration, cracking and cause your concrete to become brittle over time.
Prevention of Stains
In addition to protecting your driveway from weather-related damage, sealing also helps prevent unsightly stains. Concrete driveways are susceptible to oil, grease, and other spills, which can leave stubborn marks that are difficult to remove. A sealed surface is much more resistant to these substances, making it easier to clean and maintain. This is particularly important if you live in an area with heavy vehicle traffic or if you frequently entertain guests, as spillages are more likely to occur.
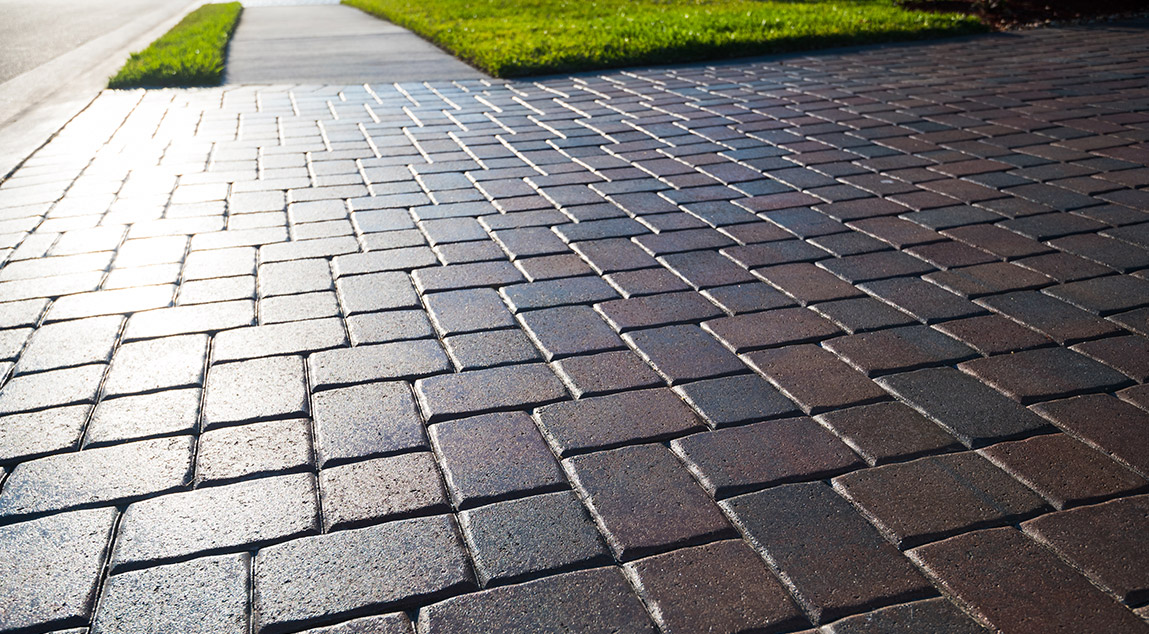
Enhance the Appearance of Your Driveway
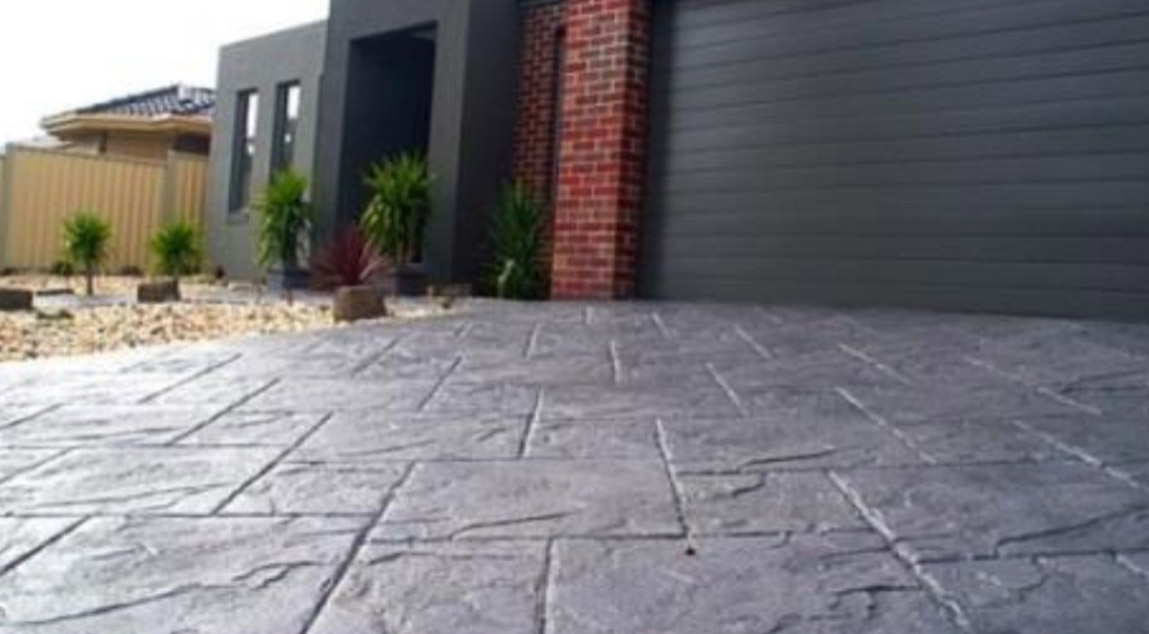
Apart from the practical uses, sealing can also enhance the appearance of your driveway. Concrete sealers come in various finishes, from glossy wet-look options to more subtle matte finishes. This allows you to choose a sealant that complements your home’s exterior design and creates a cohesive look. In some cases, you might opt for a decorative sealer that adds unique patterns or textures to your driveway, further elevating its aesthetic appeal.
Prolong the Life of Your Concrete Surface
Sealed concrete is less susceptible to common types of damage, including cracking, scaling, and spalling. This is because the sealant fills any existing micro-cracks and strengthens the concrete surface, reducing the likelihood of new cracks forming. By sealing your driveway, you can preserve its structural integrity and prolong its life, saving you the hassle and expense of repairing or replacing the concrete in the future.
Things to Consider When Sealing Your Driveway
Some sealers can be slippery when wet, posing a safety hazard, especially if your driveway has a steep incline. In addition, sealants do need to be applied in a specific way, and these application processes vary depending on the type. To mitigate these risks, it’s crucial to research the appropriate sealant type for your specific needs and carefully follow the application instructions. If you’re unsure about any aspect of the sealing process or want a specific finish, give Australian Slate-Crete Supplies a call for professional advice.
Now, we begin with the process of applying the sealant!
Step 1: Clean the Surface
A clean and well-prepared surface is crucial for the success of any sealing project. This not only ensures proper adhesion of the sealer but also enhances the overall appearance of your driveway. Failing to clean the surface thoroughly can result in uneven application, poor adhesion, and a less-than-ideal finish. So, take the time to remove any oil, dirt, and existing sealant from your driveway before proceeding with the sealing process.
Using a pressure washer in combination with concrete cleaning chemicals will make this task much more manageable. A scrub brush can also be helpful in removing stubborn stains and ingrained dirt.
For those wondering whether a standard garden hose will suffice, it’s worth mentioning that a pressure washer is far more effective in removing dirt and debris. The high-pressure water can dislodge even the most stubborn grime, ensuring a pristine surface for the sealer to adhere to.
Moreover, it’s not uncommon for existing sealant to remain on the driveway, even after a thorough cleaning. In some cases, you’ll need to remove the old sealant layer to ensure proper adhesion of the new sealer. A chemical stripper or a grinder equipped with a diamond grinding wheel are both effective options for removing old sealant.
When it comes to cleaning the driveway, it’s essential to be diligent and patient. Rushing the process may leave behind dirt or old sealant, which could compromise the effectiveness of the new sealer. Additionally, cleaning the driveway provides an opportunity to inspect for any damage that may need repair before sealing.
Step 2: Mix Up Your Chosen Concrete Sealer
When it comes to sealing your concrete driveway, selecting the right sealer is crucial for achieving the desired outcome. Various sealant types offer unique benefits and drawbacks, which we will outline below.
Acrylic/Resin Sealers
Acrylic sealers, also known as solvent-based concrete sealers, are the most popular and budget-friendly option for many homeowners. These sealers form a protective film on the surface of your driveway, shielding it from stains and water infiltration. These sealers come in both glossy or matte finish, depending on your preference. While they provide adequate protection, they may require reapplication more frequently than other sealers – typically every 2-3 years. Australian Slate-Crete Supplies provides our own proprietary resin sealant, with years of testing and retesting to back up its performance.
Penetrating Sealers
For those who prefer a more natural look and feel for their concrete driveway, penetrating sealers are an excellent option. These sealers work by penetrating the concrete surface and creating a chemical barrier that protects against moisture and staining chemicals. They don’t alter the appearance of your driveway, preserving its original texture and colour. While they may be more expensive than acrylic sealers, they offer long-lasting protection, typically requiring reapplication every 4-5 years. Miteq is our top recommended brand.
Water Based Sealers
Water based concrete sealers are one of the newer sealants on the market, but we highly recommend them. They contain a far lower level of Volatile Organic Compounds (VOCs), making them safer to apply and be around than some other sealants. A water based concrete sealer is simple to apply and one of the most durable sealants, designed to withstand the harsh Australian climate. At Australian Slate Crete, we have a wide range of high quality water based concrete sealer options to choose from, including iChem Wetlook and Aquepoxy.
Things to Consider When Selecting a Sealer
Before choosing a sealer, consider these factors:
- Budget: Assess how much you’re willing to spend on sealing your driveway. Acrylic sealers are more affordable but may require more frequent reapplications, while epoxy and penetrating sealers are more expensive but offer longer-lasting protection.
- Appearance: Determine the desired finish for your driveway – glossy, matte, or natural. Acrylic and water-based sealers provide varying levels of shine, while penetrating sealers maintain the original look of your concrete.
- Protection Level: Consider the type of protection you need for your driveway. If you live in an area with harsh weather conditions or frequent exposure to chemicals, a more robust sealer like water-based or penetrating sealer may be the better choice.
Tips for Success
No matter which sealant or method you choose, there are a few essential tips to keep in mind for a successful sealing job:
- Before you apply the sealer to the entire driveway, test a small spot in a hard to see area. This will help you gauge the sealer’s performance and ensure you’re happy with the end result.
- Follow the manufacturer’s instructions for mixing the sealer and applying it, as different products may have unique requirements.
- Monitor the weather: The ideal temperature for applying a concrete sealer is between 10 and 30 degrees Celsius, with low humidity. Avoid sealing your driveway on extremely hot or cold days or when rain is expected within the next 24 hours.
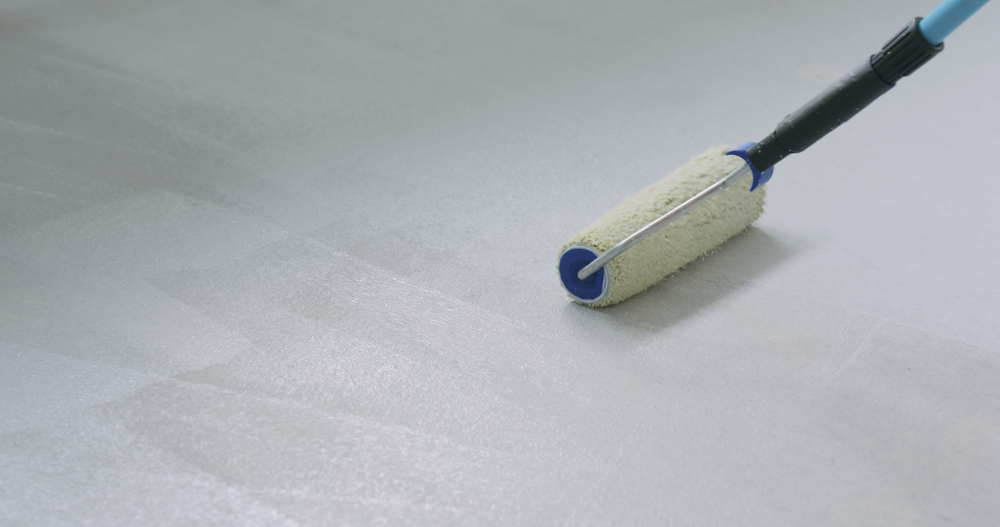
Step 3. Apply Sealer Using Roller, Sprayer or Broom
Before diving into the application process, it’s crucial to understand the two primary methods for applying concrete sealer: using a roller, a sprayer or a broom. All of these methods have their own set of advantages and disadvantages, and understanding these factors will help you make an informed decision on which method best suits your specific needs.
The Roller Method
The roller method offers precise control and ensures an even application of the sealer. This is particularly beneficial for those who are new to sealing a concrete driveway, as it minimises the risk of over-application or uneven coverage. Additionally, rollers are less likely to cause overspray, which can lead to sealer landing on adjacent areas and creating a mess.
However, the roller method can be more time-consuming compared to the sprayer method, especially for larger driveway surfaces. Moreover, using a roller may require more physical effort, which can be a downside for some individuals.
The Sprayer Method
On the other hand, the sprayer method allows for faster application, covering larger areas in a shorter period of time. This method is ideal for those with larger driveways or who have prior experience in sealing concrete surfaces. Despite its speed, the sprayer method does have a few drawbacks, including a higher likelihood of overspray, streaks and a steeper learning curve for achieving an even application. Moreover, sprayers can be more expensive to purchase or rent compared to rollers, which may be a deterrent for some homeowners.
Brooming
Alternatively, most concrete sealers can be applied using a broom. On rougher textured concrete the broom may provide a more even finish than a roller. Just be sure that the broom you use is solvent resistant (ideally a natural hair broom). Australian Slate Crete has a large range of sealer safe brooms.
Important Tips
Allow for adequate drying time: Rushing the drying process can lead to poor adhesion and an uneven finish. Be sure to follow the manufacturer’s recommendations for drying times between coats and before allowing foot or vehicle traffic on the sealed surface.
Use proper application techniques: Whether using a roller or sprayer, ensure even coverage by applying the sealer in thin, overlapping coats. Avoid creating bubbles or puddles, which can lead to an uneven finish and reduced durability. Generally sealer will behave better if it is applied sparingly. Two thin coats will always be better than a thick coat. Applying any paint thick is asking for trouble.
Step 4: Allow First Coat to Dry, Apply Second Coat
The process of applying a second coat of sealer to your concrete driveway is not as straightforward as it may initially seem. There are several factors to consider, such as the specific sealer brand, the drying time, and achieving even coverage. In this section, we’ll look into these factors to help ensure a successful sealing project.
Understanding Sealer Brands and Second Coat Requirements
Not all concrete sealers are created equal. Some brands may require a second coat, while others may not. It’s essential to carefully read the instructions provided by the manufacturer of your chosen sealer. This information will guide you on whether a second coat is necessary and, if so, the appropriate drying time between coats.
Drying Time – Patience is Key
Resisting the temptation to apply the second coat too soon is crucial for the success of your sealing project. The first coat typically takes between 2 to 4 hours to dry, but this can vary depending on the sealer brand and weather conditions. Applying the second coat too soon can lead to uneven coverage, reduced durability, and a less than desirable appearance. Being patient and allowing the first coat to dry completely will help ensure a more effective and long-lasting seal.
Achieving Even Coverage
When applying the second coat, it’s vital to use the same application method as the first coat, whether that be with a roller or a sprayer. This consistency helps to create a uniform appearance and ensures the sealer bonds properly with the concrete surface.
When applying the second coat, overlap your strokes or sprayer passes to avoid leaving any gaps or thin spots. It’s also wise to work in sections, which can help prevent mistakes and ensure even coverage.
Things to Consider and Tips for Success
Before diving into the second coat application, here are a few things to consider and tips for success:
- Check the weather forecast: Ensure that there is no rain or extreme temperature fluctuations expected within the drying time window.
- Monitor the first coat’s progress: Keep an eye on the first coat as it dries to ensure it’s curing evenly and without any issues.
- Use the right tools: High-quality rollers or sprayers can make a difference in the ease and efficiency of application.
- Follow the manufacturer’s recommendations: Adhering to the specific guidelines provided by the sealer brand can help prevent mistakes and ensure a successful sealing project.
Step 5. Allow to Dry Before Walking On It!
Before you fully enjoy your newly sealed driveway, it’s vital to allow it to dry completely. Drying times can vary depending on the type of sealer used and the weather conditions, but most sealers require 12-24 hours before foot traffic and 7 days before vehicle traffic. By ensuring proper drying time, you’ll achieve the best results and avoid damaging the newly sealed surface.
One common question homeowners ask is why the drying time differs for foot and vehicle traffic. The reason is that the weight and pressure exerted by vehicles are significantly higher than that of pedestrians. Allowing the sealer to cure for an extended period ensures that it is strong enough to withstand the weight and pressure of vehicles without causing any damage. Also the risk of hot tyre pickup is increased. When a car has been driving for a while, the tyre will heat up and expand. When you park and stop driving, the tyres will cool down and shrink. This can cause the sealer to somewhat adhere to the tyres, and will be ripped off when the car is driven again. This can happen even on cured sealer in very hot weather, but driving on it too soon is the number one cause of this.
You might be wondering how weather conditions can affect the drying time. Factors such as high or low temperature, high or low humidity, and direct sunlight can speed up or slow down the curing process of the sealer. For instance, higher temperatures and low humidity can speed up the drying process, while cooler temperatures and high humidity can slow it down.
In some cases, homeowners may be tempted to speed up the drying process using fans or heaters. However, this is not recommended as it can cause the sealer to dry unevenly, leading to a less durable and less attractive finish. Instead, it’s essential to let the sealer dry naturally, even if it takes a bit longer.
To help you plan for the drying time, here are a few tips:
- Allow for extra time: If possible, add a buffer of a day or two to the recommended drying times to account for any unforeseen weather changes or other delays.
- Keep pets and children away: Make sure to keep pets and children off the driveway during the drying period to avoid any accidents or damage to the surface. While pawprints are cute, they’re frustrating when imprinted on your newly sealed concrete!
- Place barriers or signs: Use cones, barriers, or signs to inform others that the driveway is off-limits until the sealer is fully cured.
Conclusion
Now you understand more about the ins and outs of concrete sealing. Whether you choose high-gloss or matte, water-based or acrylic sealant or applying with a roller or sprayer, you now know how to achieve the best possible results. A correctly sealed concrete driveway will look great and stand the test of time for years to come.
Frequently Asked Questions About Concrete Sealing
This can be caused by a number of factors, but the most common one is that the layer of sealant you have applied is too thick. If you notice bubbles, try backrolling the area with a dry roller to absorb the excess sealant. Essentially what is happening is the surface of the sealer has dried faster than the rest of it, and has skinned. As the sealer below continues to cure, the solvent in it will rise and try to make its way through the skin, causing a bubble. This is also likely if applied on a hot day in direct sunlight.
This depends on the curing rate of the specific content used, temperature and rain in your area. We recommend waiting a minimum of 7 days before applying sealant to your new driveway. It is also critical to acid wash all new concrete prior to sealing. Acid washing should only be done after a minimum of seven days.
One telltale sign your driveway needs to be resealed is that it appears patchy, dull or faded when it is wet, but gets darker when wet. This means water is being absorbed into the concrete and your sealant is no longer as effective as it used to be.
Generally, no. This can cause lifting or cracking of the new sealant due to poor adhesion. If your old sealant is breaking, strip it off and clean the driveway thoroughly before reapplying.
All of the sealants we stock are UV-resistant, meaning they both protect the concrete from fading and will not yellow or discolour under direct sunlight.
If you’re looking for the best quality concrete supplies, Melbourne residents can trust Australian Slate-Crete Supplies. We can provide you with all of the tools and products you’ll need to seal your own concrete surfaces, as well as experienced advice. No question is too simple or complex – we are here to help you with all of your concreting endeavours.
For more information or to talk with our friendly staff about your next concrete sealing project, call us on 03 9408 7722 or visit our website today.
-
 February 4, 2022Sandstone Concrete Stencil
Do you want to add a touch of luxury and elegance to your concrete projects? If so, then consider using sandstone concrete stencils!
Read More -
 February 4, 2022Gloss Brick Sealer
Gloss brick sealer is a wonderful material for adding a brilliant shine to your brick slip wall feature.
Read More -
 February 4, 2022Bluestone Concrete Sealer
In a broad sense, the term “bluestone” is sometimes used to refer to a variety of stones. It’s a marketing term rather than a geological one.
Read More